Enhancing your home with handwoven items made of natural materials can bring warmth, texture, and artisanal charm to your living space. Whether it’s a captivating art, a charming woven wall hanging, or a collection of handwoven items, knowing how to hang them properly will maximize their visual impact and create stunning focal points in any room.
In this comprehensive guide, we will walk you through the simple steps to hang handwoven baskets on your walls using a variety of methods, including adhesive options, hooks, and tape. These techniques are designed for easy implementation, utilizing readily available materials found in local stores or even at home. Let’s dive in and make the process as straightforward as possible.
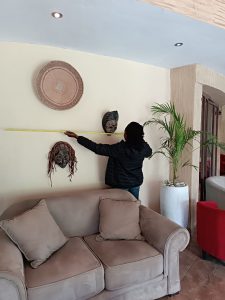
Begin by selecting the ideal spot on your wall for showcasing your handwoven item. Consider factors such as room layout, natural lighting, existing décor, and eye-level visibility.
Using a measuring tape or ruler, determine the height and width of your handwoven item. Locate the center point on the back of the item and mark it with a pencil or chalk.
Consider the weight and size of your handwoven piece to decide the appropriate hanging method. Here are three common options:
Clean the area of the wall where you plan to hang your handwoven item, ensuring it is free from dust or debris that might compromise adhesion or affect the hanging process.
Lift your handwoven item, aligning the marked center point with the chosen hanging method. Press the item firmly against the wall or attach it to the hooks, ensuring it hangs straight. Use a level if desired to check for perfect alignment.
Once your handwoven item is hung, gently give it a light tug to ensure it is securely attached to the wall. Make any necessary adjustments to ensure stability.
By following this comprehensive DIY guide, you can confidently hang your handwoven baskets on your walls, transforming your living space into a cozy and visually captivating environment. Choose the hanging method that best suits your handwoven item’s weight and size, utilizing materials readily available from local stores or even at home. Whether you opt for double-sided tape, adhesive hooks, or wall anchors and hooks, the process is straightforward and adjustable.
Disclaimer: Always follow manufacturer instructions, exercise caution when handling tools, and consider wall type and weight limitations when selecting the appropriate hanging method. Test the adhesive strength on a small, inconspicuous area of the wall before applying it to your handwoven item.


Quick Links
Location